DNS Verification
DNS verification proves that your organization controls the domain shown on its profile. In POK Proof of Knowledge, you start the process from your organization settings, generate a verification code (a POK proof), and add it as a TXT record in your domain's DNS settings. Once the record is in place, your domain is verified.
Start the verification in POK
-
Log in with an administrator account.
-
Go to Organization Settings.
-
Select Start on Web (dns).
-
Enter your organization's website.
-
In the message that appears, click Back to Profile.
-
In the profile, you will see the website to be validated and the Complete Verification button.
-
Click Complete Verification to generate a POK proof. You will need this code later, when you create the TXT record at your domain provider.
Add the TXT record at your domain provider
-
Log in to your domain provider account. This example uses GoDaddy.
-
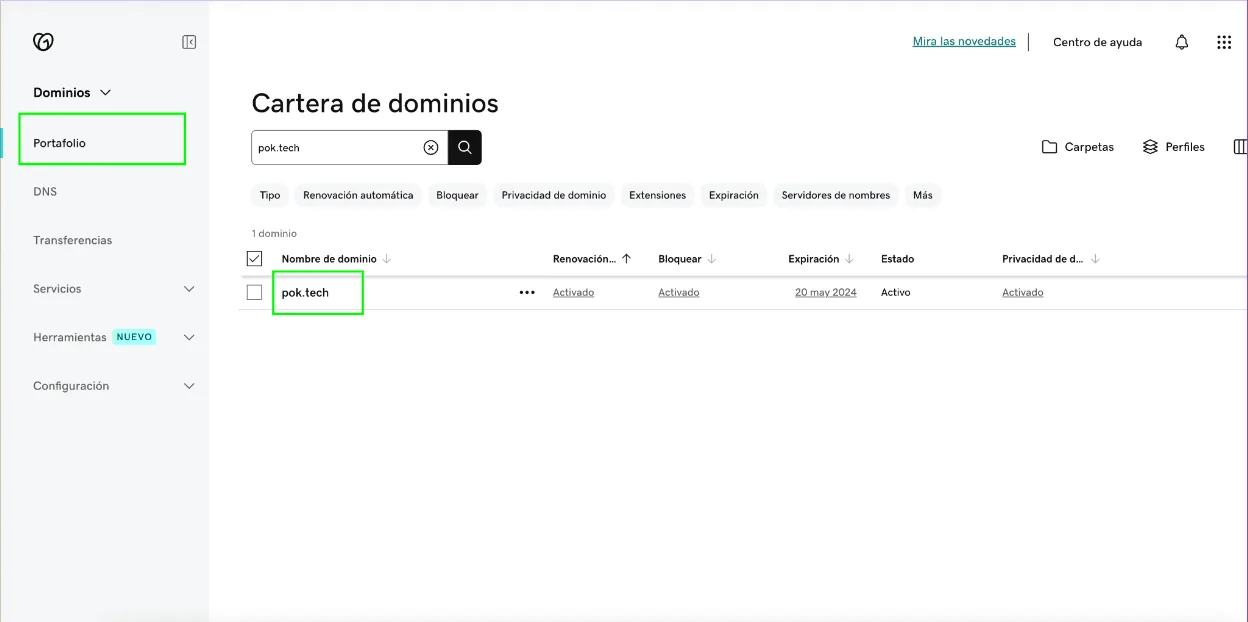
Select Portfolio and click the domain you want to verify.
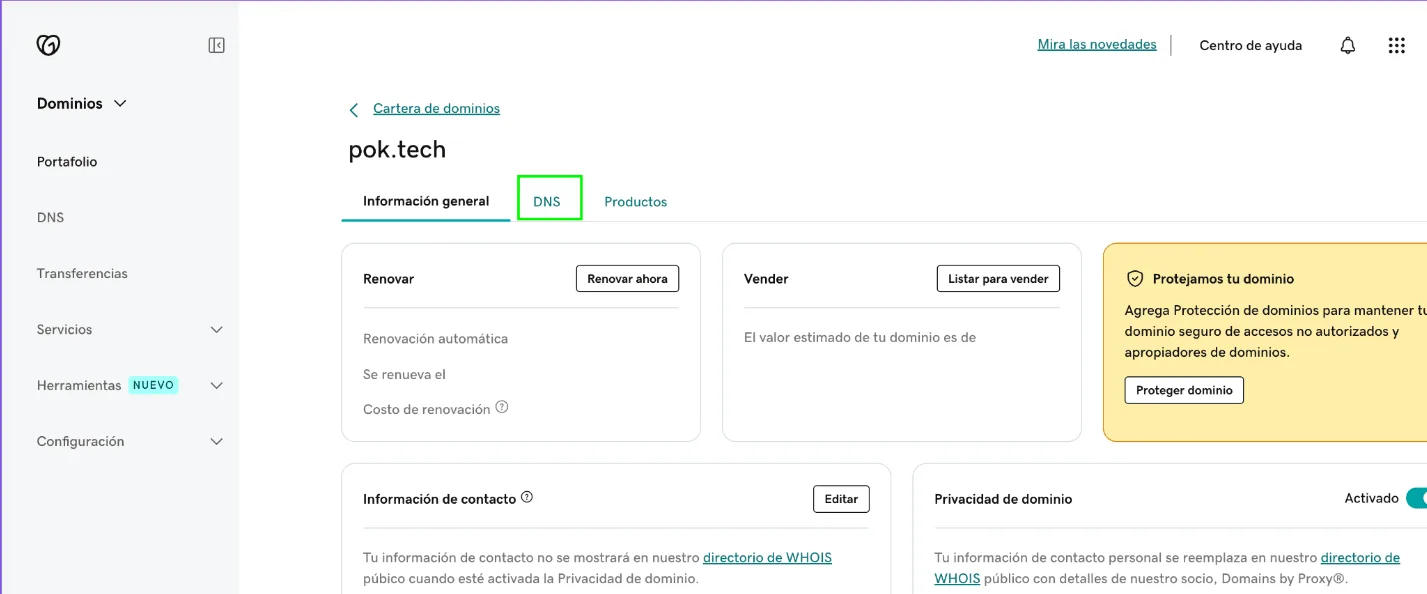
- Select the DNS option.
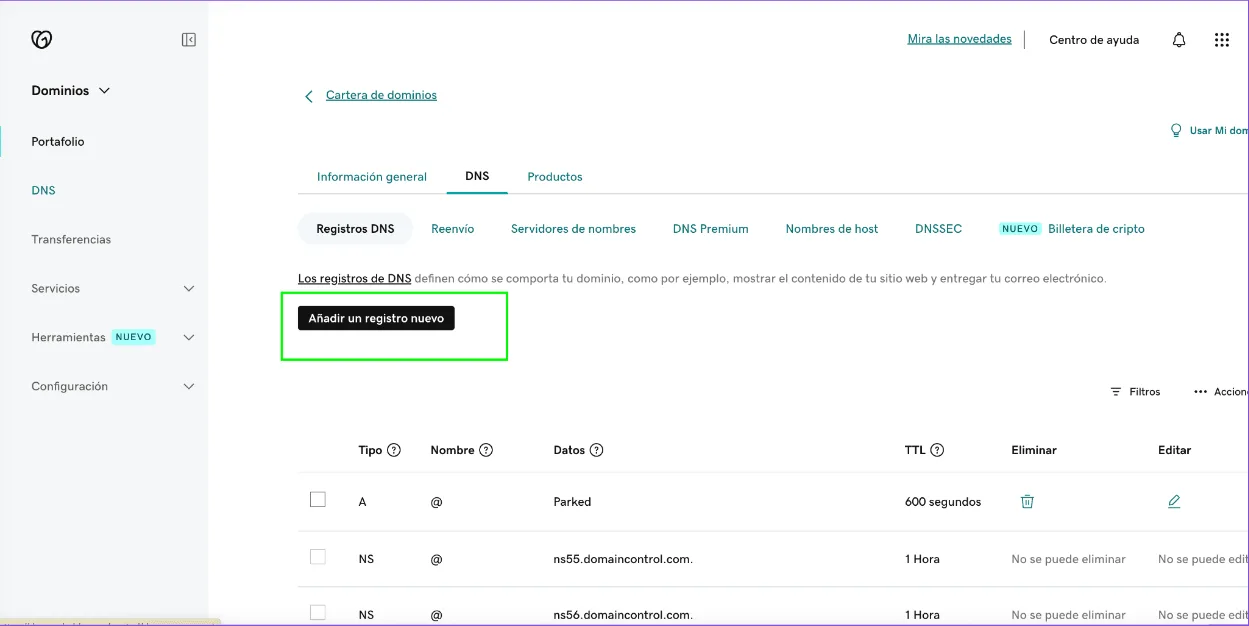
- Look for the Add a new record option.
- Select the TXT type and enter a name for the new record. In the record name, you must enter: _pok. In Value, paste the POK proof generated in the previous step.
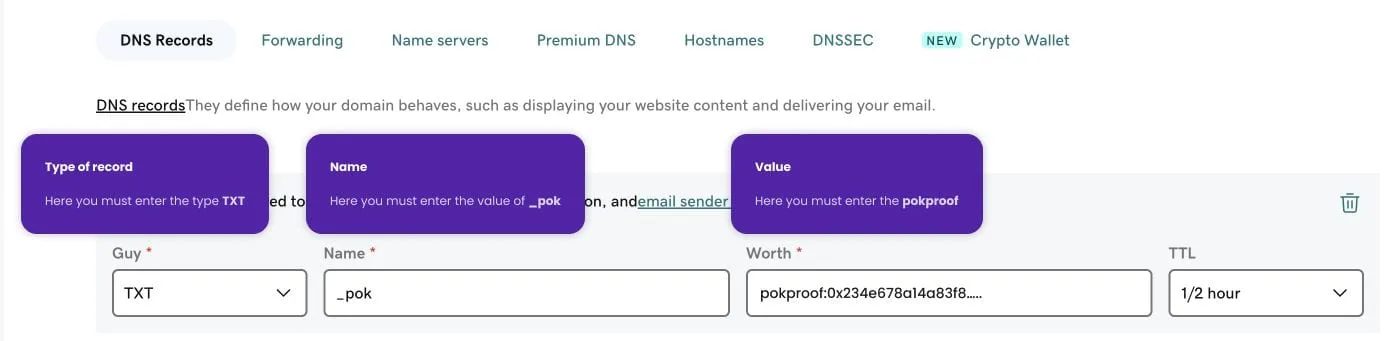
- Save the changes.
Where to manage your DNS records
Every domain is registered with a domain service provider, and it is on that provider's platform where you manage settings such as DNS records.
To complete the verification, you need to access your domain provider's platform (GoDaddy, for example) and add the verification information provided by POK to your domain's DNS settings. This proves that you control the domain and completes the DNS verification process with POK.
Most providers document how to add a TXT record:
- GoDaddy: see the guide "Add a TXT record"
- AWS Route 53: see the guide "Manage DNS records"
- Cloudflare: see the guide "Simple records values"
- Microsoft Azure: see the tutorial "Create DNS records in a custom domain for a web app"
- Google Cloud DNS: see the guide "Add, modify, and delete records"